Introduction
Apache Spark is an open-source framework that processes large volumes of stream data from multiple sources. Spark is used in distributed computing with machine learning applications, data analytics, and graph-parallel processing.
This guide will show you how to install Apache Spark on Windows 10 and test the installation.

Prerequisites
- A system running Windows 10
- A user account with administrator privileges (required to install software, modify file permissions, and modify system PATH)
- Command Prompt or Powershell
- A tool to extract .tar files, such as 7-Zip
Install Apache Spark on Windows
Installing Apache Spark on Windows 10 may seem complicated to novice users, but this simple tutorial will have you up and running. If you already have Java 8 and Python 3 installed, you can skip the first two steps.
Step 1: Install Java 8
Apache Spark requires Java 8. You can check to see if Java is installed using the command prompt.
Open the command line by clicking Start > type cmd > click Command Prompt.
Type the following command in the command prompt:
java -versionIf Java is installed, it will respond with the following output:
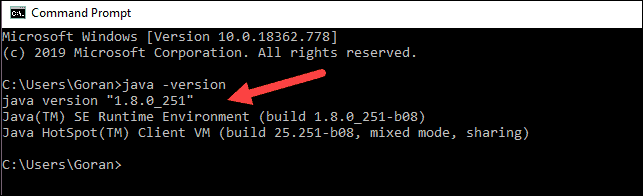
Your version may be different. The second digit is the Java version – in this case, Java 8.
If you don’t have Java installed:
1. Open a browser window, and navigate to https://java.com/en/download/.
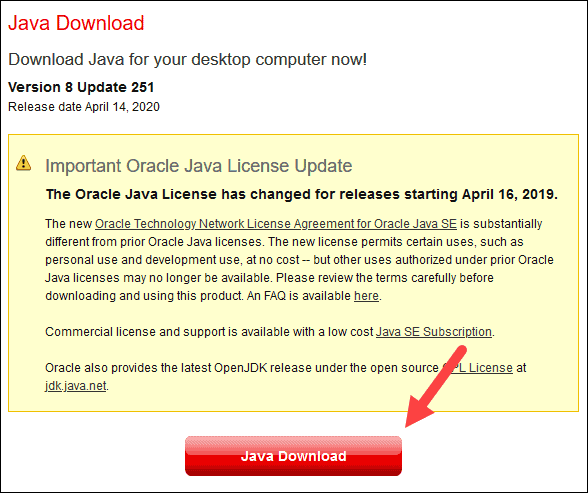
2. Click the Java Download button and save the file to a location of your choice.
3. Once the download finishes double-click the file to install Java.
Note: At the time this article was written, the latest Java version is 1.8.0_251. Installing a later version will still work. This process only needs the Java Runtime Environment (JRE) – the full Development Kit (JDK) is not required. The download link to JDK is https://www.oracle.com/java/technologies/javase-downloads.html.
Step 2: Install Python
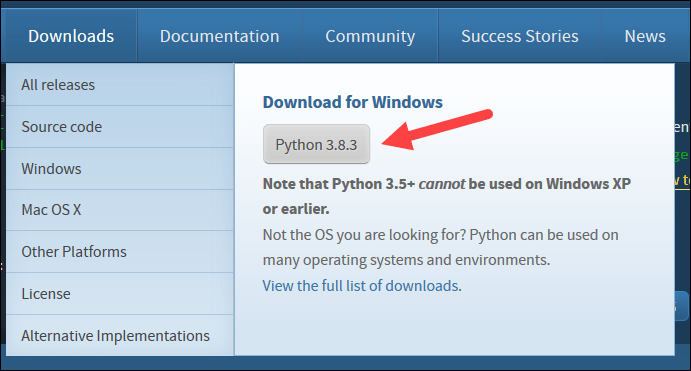
1. To install the Python package manager, navigate to https://www.python.org/ in your web browser.
2. Mouse over the Download menu option and click Python 3.8.3. 3.8.3 is the latest version at the time of writing the article.
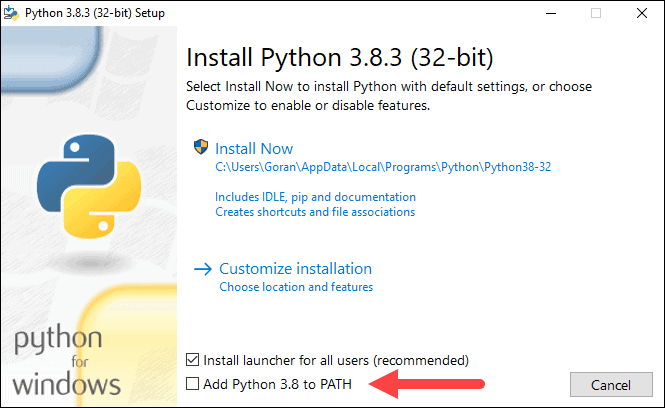
3. Once the download finishes, run the file.
4. Near the bottom of the first setup dialog box, check off Add Python 3.8 to PATH. Leave the other box checked.
5. Next, click Customize installation.
6. You can leave all boxes checked at this step, or you can uncheck the options you do not want.
7. Click Next.
8. Select the box Install for all users and leave other boxes as they are.
9. Under Customize install location, click Browse and navigate to the C drive. Add a new folder and name it Python.
10. Select that folder and click OK.

11. Click Install, and let the installation complete.
12. When the installation completes, click the Disable path length limit option at the bottom and then click Close.
13. If you have a command prompt open, restart it. Verify the installation by checking the version of Python:
python --versionThe output should print Python 3.8.3.
Note: For detailed instructions on how to install Python 3 on Windows or how to troubleshoot potential issues, refer to our Install Python 3 on Windows guide.
Step 3: Download Apache Spark
1. Open a browser and navigate to https://spark.apache.org/downloads.html.
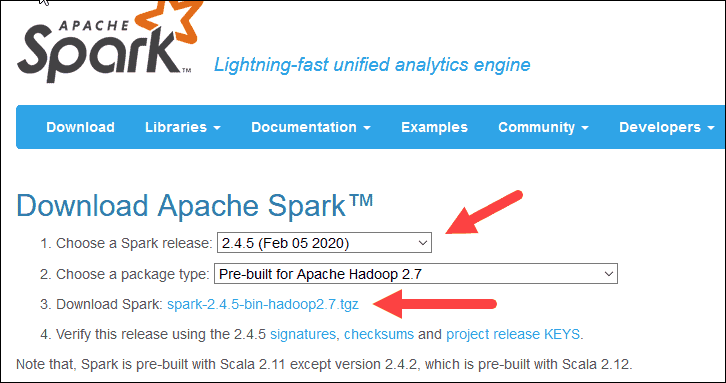
2. Under the Download Apache Spark heading, there are two drop-down menus. Use the current non-preview version.
- In our case, in Choose a Spark release drop-down menu select 2.4.5 (Feb 05 2020).
- In the second drop-down Choose a package type, leave the selection Pre-built for Apache Hadoop 2.7.
3. Click the spark-2.4.5-bin-hadoop2.7.tgz link.
4. A page with a list of mirrors loads where you can see different servers to download from. Pick any from the list and save the file to your Downloads folder.
Step 4: Verify Spark Software File
1. Verify the integrity of your download by checking the checksum of the file. This ensures you are working with unaltered, uncorrupted software.
2. Navigate back to the Spark Download page and open the Checksum link, preferably in a new tab.
3. Next, open a command line and enter the following command:
certutil -hashfile c:\users\username\Downloads\spark-2.4.5-bin-hadoop2.7.tgz SHA5124. Change the username to your username. The system displays a long alphanumeric code, along with the message Certutil: -hashfile completed successfully.
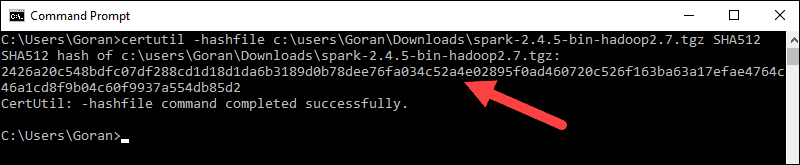
5. Compare the code to the one you opened in a new browser tab. If they match, your download file is uncorrupted.
Step 5: Install Apache Spark
Installing Apache Spark involves extracting the downloaded file to the desired location.
1. Create a new folder named Spark in the root of your C: drive. From a command line, enter the following:
cd \

mkdir Spark
2. In Explorer, locate the Spark file you downloaded.
3. Right-click the file and extract it to C:\Spark using the tool you have on your system (e.g., 7-Zip).
4. Now, your C:\Spark folder has a new folder spark-2.4.5-bin-hadoop2.7 with the necessary files inside.
Step 6: Add winutils.exe File
Download the winutils.exe file for the underlying Hadoop version for the Spark installation you downloaded.
1. Navigate to this URL https://github.com/cdarlint/winutils and inside the bin folder, locate winutils.exe, and click it.
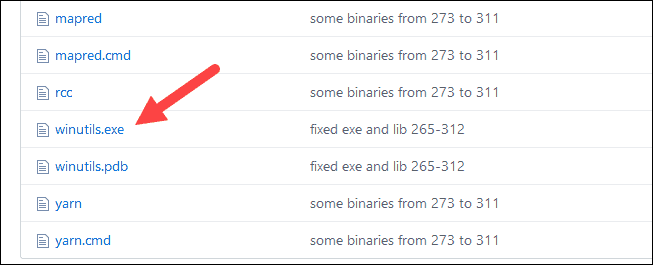
2. Find the Download button on the right side to download the file.
3. Now, create new folders Hadoop and bin on C: using Windows Explorer or the Command Prompt.
4. Copy the winutils.exe file from the Downloads folder to C:\hadoop\bin.
Step 7: Configure Environment Variables
Configuring environment variables in Windows adds the Spark and Hadoop locations to your system PATH. It allows you to run the Spark shell directly from a command prompt window.
1. Click Start and type environment.
2. Select the result labeled Edit the system environment variables.
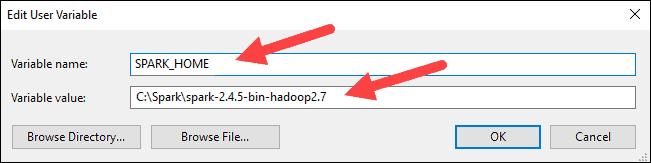
3. A System Properties dialog box appears. In the lower-right corner, click Environment Variables and then click New in the next window.

4. For Variable Name type SPARK_HOME.
5. For Variable Value type C:\Spark\spark-2.4.5-bin-hadoop2.7 and click OK. If you changed the folder path, use that one instead.
6. In the top box, click the Path entry, then click Edit. Be careful with editing the system path. Avoid deleting any entries already on the list.
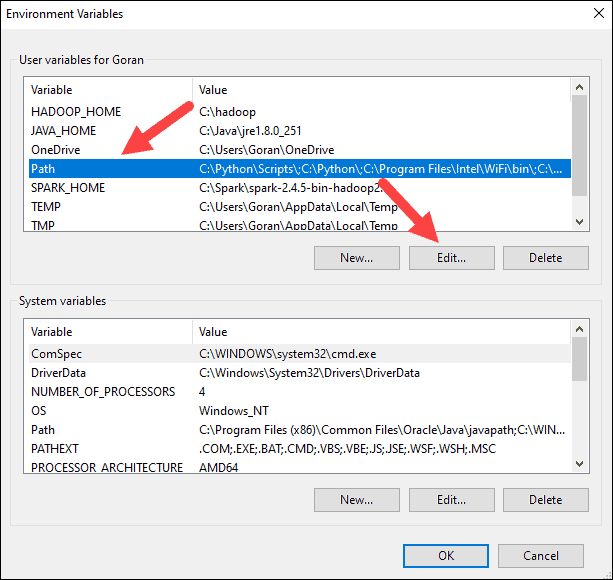
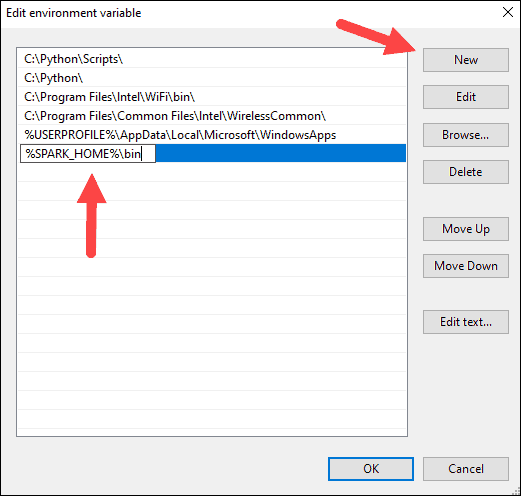
7. You should see a box with entries on the left. On the right, click New.
8. The system highlights a new line. Enter the path to the Spark folder C:\Spark\spark-2.4.5-bin-hadoop2.7\bin. We recommend using %SPARK_HOME%\bin to avoid possible issues with the path.
9. Repeat this process for Hadoop and Java.
- For Hadoop, the variable name is HADOOP_HOME and for the value use the path of the folder you created earlier: C:\hadoop. Add C:\hadoop\bin to the Path variable field, but we recommend using %HADOOP_HOME%\bin.
- For Java, the variable name is JAVA_HOME and for the value use the path to your Java JDK directory (in our case it’s C:\Program Files\Java\jdk1.8.0_251).
10. Click OK to close all open windows.
Note: Star by restarting the Command Prompt to apply changes. If that doesn't work, you will need to reboot the system.
Step 8: Launch Spark
1. Open a new command-prompt window using the right-click and Run as administrator:
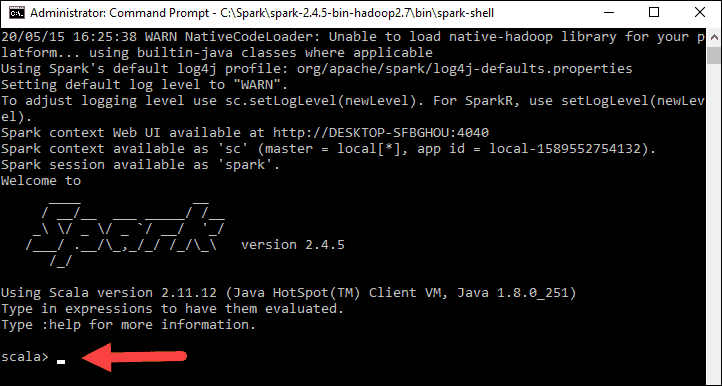
2. To start Spark, enter:
C:\Spark\spark-2.4.5-bin-hadoop2.7\bin\spark-shellIf you set the environment path correctly, you can type spark-shell to launch Spark.
3. The system should display several lines indicating the status of the application. You may get a Java pop-up. Select Allow access to continue.
Finally, the Spark logo appears, and the prompt displays the Scala shell.
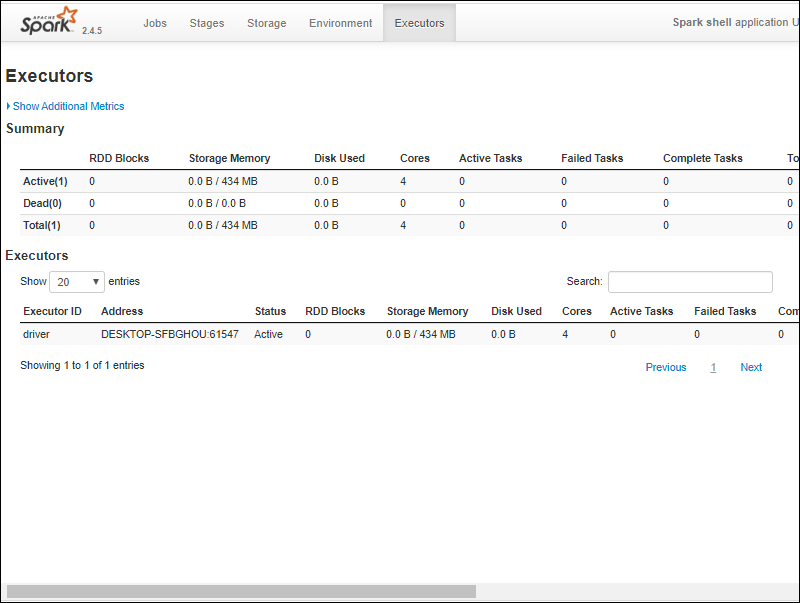
4., Open a web browser and navigate to http://localhost:4040/.
5. You can replace localhost with the name of your system.
6. You should see an Apache Spark shell Web UI. The example below shows the Executors page.
7. To exit Spark and close the Scala shell, press ctrl-d in the command-prompt window.
Note: If you installed Python, you can run Spark using Python with this command:
pyspark
Exit using quit().
Test Spark
In this example, we will launch the Spark shell and use Scala to read the contents of a file. You can use an existing file, such as the README file in the Spark directory, or you can create your own. We created pnaptest with some text.
1. Open a command-prompt window and navigate to the folder with the file you want to use and launch the Spark shell.
2. First, state a variable to use in the Spark context with the name of the file. Remember to add the file extension if there is any.
val x =sc.textFile("pnaptest")3. The output shows an RDD is created. Then, we can view the file contents by using this command to call an action:
x.take(11).foreach(println)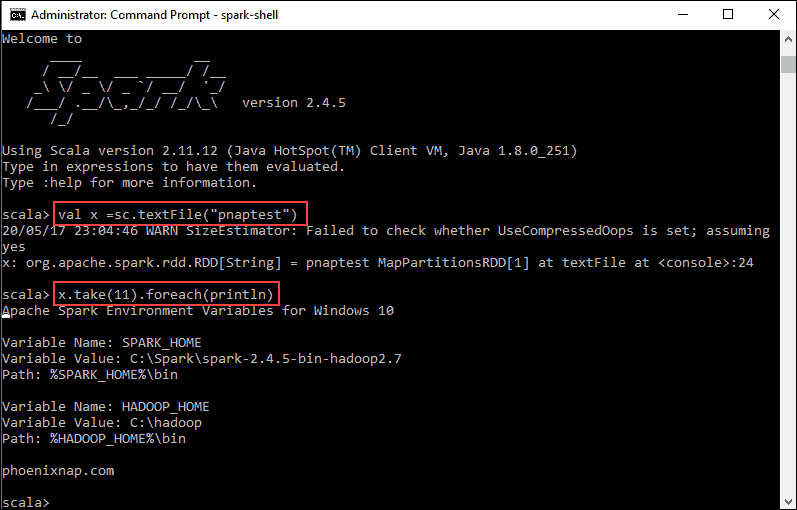
This command instructs Spark to print 11 lines from the file you specified. To perform an action on this file (value x), add another value y, and do a map transformation.
4. For example, you can print the characters in reverse with this command:
val y = x.map(_.reverse)5. The system creates a child RDD in relation to the first one. Then, specify how many lines you want to print from the value y:
y.take(11).foreach(println)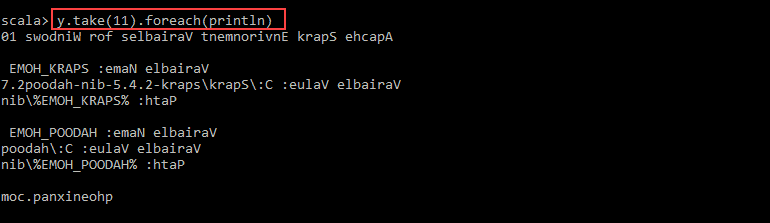
The output prints 11 lines of the pnaptest file in the reverse order.
When done, exit the shell using ctrl-d.
Conclusion
You should now have a working installation of Apache Spark on Windows 10 with all dependencies installed. Get started running an instance of Spark in your Windows environment.
Our suggestion is to also learn more about what Spark DataFrame is, the features, and how to use Spark DataFrame when collecting data.
