Introduction
SSH (Secure Shell) allows secure remote connections between two systems. With this cryptographic protocol, you can manage machines, copy, or move files on a remote server via encrypted channels.
There are two ways to login onto a remote system over SSH – using password authentication or public key authentication (passwordless SSH login).
In this tutorial, you will find out how to set up and enable passwordless SSH login.

Prerequisites
- Access to command line/terminal window
- User with sudo or root privileges
- A local server and a remote server
- SSH access to a remote server via command line/terminal window
Before You Start: Check for Existing SSH Keys
You may already have an SSH key pair generated on your machine. To see whether you have SSH keys on the system, run the command:
ls -al ~/.ssh/id_*.pubIf the output tells you there are no such files, move on to the next step, which shows you how to generate SSH keys.
In case you do have them, you can use the existing keys, back them up and create a new pair or overwrite it.
Step 1: Generate SSH Key Pair
1. The first thing you need to do is generate an SSH key pair on the machine you are currently working on.
In this example, we generate a 4096-bit key pair. We also add an email address, however this is optional. The command is:
ssh-keygen -t rsa -b 4096 -C "[email protected]"
2. Next, type in the location where you want to store the keys or hit Enter to accept the default path.
3. It also asks you to set a passphrase. Although this makes the connection even more secure, it may interrupt when setting up automated processes. Therefore, you can type in a passphrase or just press Enter to skip this step.

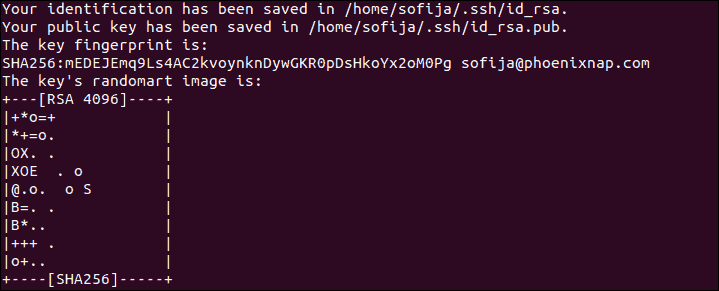
4. The output then tells you where it stored the identification and public key and gives you the key fingerprint.

5. Verify you have successfully created the SSH key pair by running the command:
ls -al ~/.ssh/id_*.pubYou should see the path of the identification key and the public key, as in the image below:

Step 2: Upload Public Key to Remote Server
You can upload the public SSH key to a remote server with the ssh-copy-id command or the cat command. Below you can find both options.
Option 1: Upload Public Key Using the ssh-copy-id Command
To enable passwordless access, you need to upload a copy of the public key to the remote server.
1. Connect to the remote server and use the ssh-copy-id command:
ssh-copy-ide [remote_username]@[server_ip_address]2. The public key is then automatically copied into the .ssh/authorized_keys file.
Option 2: Upload Public Key Using the cat Command
Another way to copy the public key to the server is by using the cat command.
1. Start by connecting to the server and creating a .ssh directory on it.
ssh [remote_username]@[server_ip_address] mkdir -p .ssh2. Then, type in the password for the remote user.
3. Now you can upload the public key from the local machine to the remote server. The command also specifies that the key will be stored under the name authorized_keys in the newly created .ssh directory:
cat .ssh/id_rsa.pub | ssh [remote_username]@[server_ip_address] 'cat >> .ssh/authorized_keys'Step 3: Log in to Server Without Password
With the SSH key pair generated and the public key uploaded to the remote server, you should now be able to connect to your dedicated server without providing a password.
Check whether the setup works by running the command:
ssh [remote_username]@[server_ip_address]The system should directly log you in to the remote server, no password required.
Note: Once you verify that you can SHH into the remote serve without a password, consider disabling SSH password authentication altogether. It will add another layer of security and secure your server from brute force attacks.
Optional: Troubleshooting Remote Server File Permissions
File permissions on the remote server may cause issues with passwordless SSH login. This is a common issue with older versions of SSH.
If you are still prompted for a password after going through all the steps, start by editing file permissions on the remote server.
- Set permissions 700 for the .ssh directory.
- Set permissions 640 for the .ssh/authorized_keys directory.
Edit file permissions with the following command:
ssh [remote_username]@[server_ip_address] "chmod 700 .ssh; chmod 640 .ssh/authorized_keys"Enter your password when prompted. There will be no output if the action was successful. The issue should be resolved now.
Conclusion
If you want to automate updates and other tasks, or seamlessly SSH into a remote server, you should enable passwordless SSH login.
The instructions outlined in this article should have helped you to do so.
For more SSH commands, check out these 19 common SSH commands in Linux with examples.